What happens if one of your feature lines doesn't seem to be responding as expected? For example, what if I added an elevation point to a feature line that was part of a surface and even rebuilding the surface didn't show the elevation change. There could be several reasons for this including the possibility of the feature line being corrupt or maybe you deleted that point from the surface definition.
Whatever the issue may be, if you have a problem with a feature line, especially in conjunction with surfaces, give this a try:
- First of all save the drawing.
- Escape a few times then select the problem feature line.
- List the feature line. Make note of which site (typically Site 1) contains this feature line because you'll need it for future reference.
- Right click and select "Copy to Site..." or left click on Modify on the Feature Line Ribbon tab and select "Copy to Site..."

- Select the "Temp" site then OK.
If you haven't created the "Temp" site yet, select the drop down arrow on the Site icon then select "Create New"
  from the list. Name the new site Temp then OK. It should look something like this:

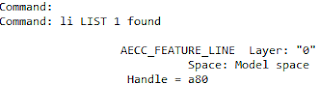
- Left click on the feature line you just copied and run the "list" command. Notice that the feature line you selected (the one on top of all others) is in the "Temp" site.
- Select the same feature line, right click, and select Display Order, Send to Back.

- Select the feature line that is now on top of the other objects and list it. It should be the original feature line in the original site (Site 1).
- Escape three times then select the feature line again and delete it from the drawing.
- Now select the feature line copy that is in the "Temp" site. If there are objects on top of the feature line, send them to back also.
- After selecting the "new" feature line, right click and select "Move to Site" or left click on Modify on the Feature Line Ribbon tab and select "Move to Site..."

- Select the site that contained the original feature line (Site 1).
- If the original feature line was part of a surface, select the feature line, right click and select "Add to Surface as Breakline"
 or left click on "Add to Surface as Breakline" on the Feature Line Ribbon tab.


